
GHI (Aux)
How to properly install the Denowatts Aux GHI. This sensor is different from the "Deno GHI Sensor."
Terminations
Please confirm that the rPOA wiring terminations match the Aux Pyr terminals, as shown in the image below.
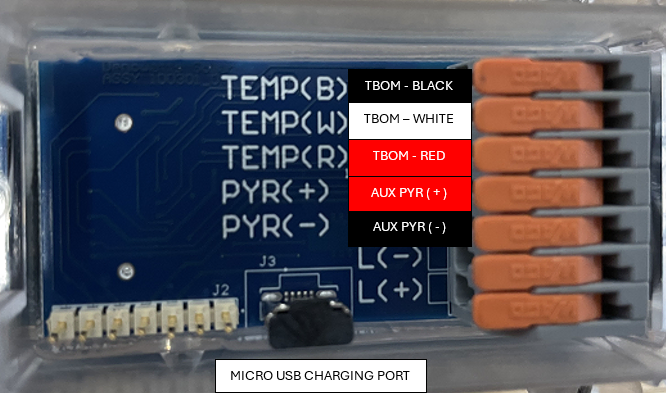
If you are replacing an old Aux GHI on a Deno 4.2 or 4.3, use the image above. If you are servicing an Aux GHI on Deno models 4.0 and 4.1, use the image below.
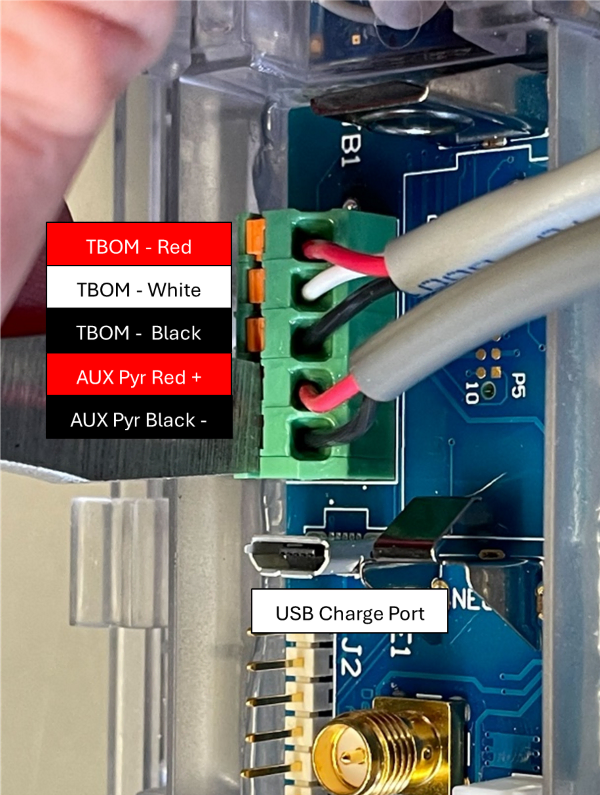
Installation Steps
1. Locate Sensor
The Aux GHI will be mounted near the Deno sensor. There is usually a module gap over from the Deno sensor at the top edge of the array. Be sure not to mount it too close to Deno Senor or the Antenna to prevent shading on any equipment. (See images below)
2. Mount Sensor
Use the provided hardware to mount the Aux GHI between two panel frames at the top edge of the panel. Adjust the double-ball mounting arm to move the GHI into position until the bubble level is centered on the circle indicator.
3. Wire Management
Tidy up any remaining cable with zip ties and wire clips away from sharp edges and DC homerun cables.
4. Pictures
Please document the entire installation with several photos
Example Install Pictures
Example Installation Pictures of Aux GHIs
Notice how Aux GHI is mounted on the high edge of the panel frame, away from shading the Deno sensor or getting shaded by the Deno antenna.
Depiction of double-ball mount arm positioning 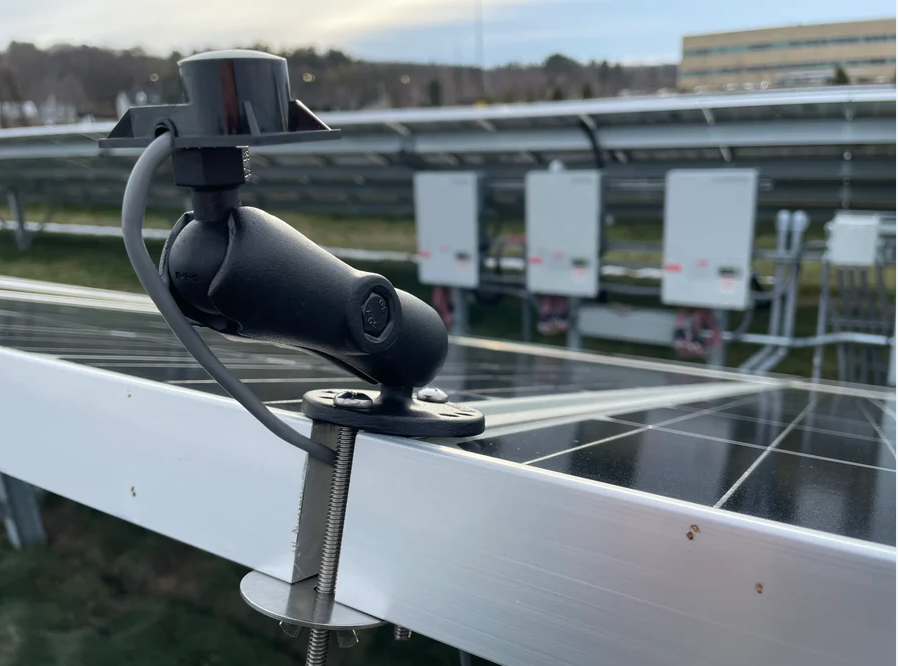
Notice in the image below that the bubble is in the middle of the indicator, ensuring a flat installation. 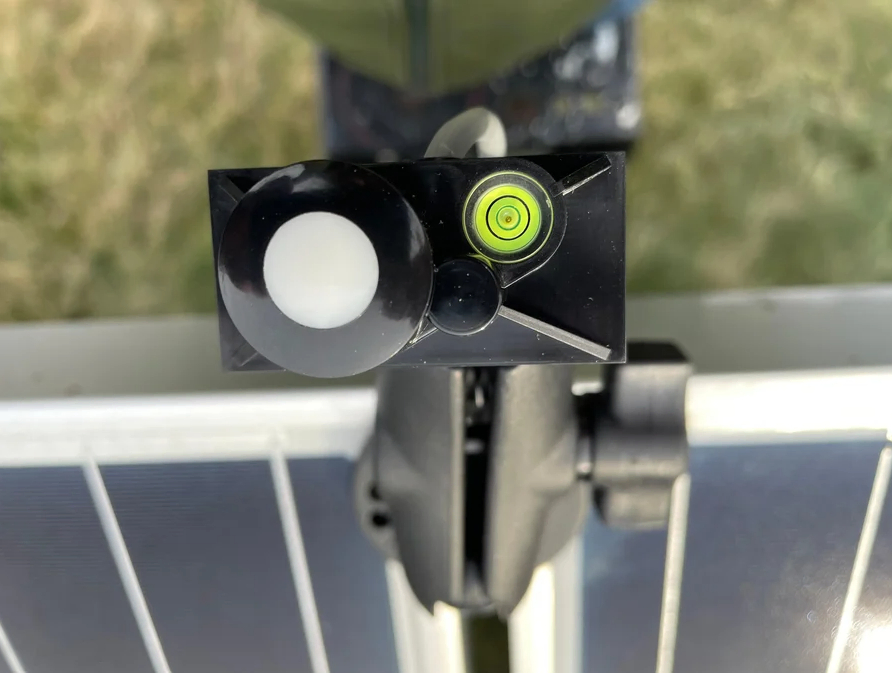
Please contact Denowatts at any point while reading this guide with questions, comments, or concerns:
- By Phone: 978.309.6688 x1
- Email: support@denowatts.com
- Check out the Denowatts Support Center for more articles that dive deeper into our methodology and software.
Last updated on