
1. Gateway
Use the following three pages to properly install the Denowatts G3 Gateway device (Gateway, Antenna, Network).
-
Download our Gateway + Hub installation and product cut sheets for a concise overview, including descriptions of the device's features and best installation practices.
This first page details the physical installation of the gateway device.
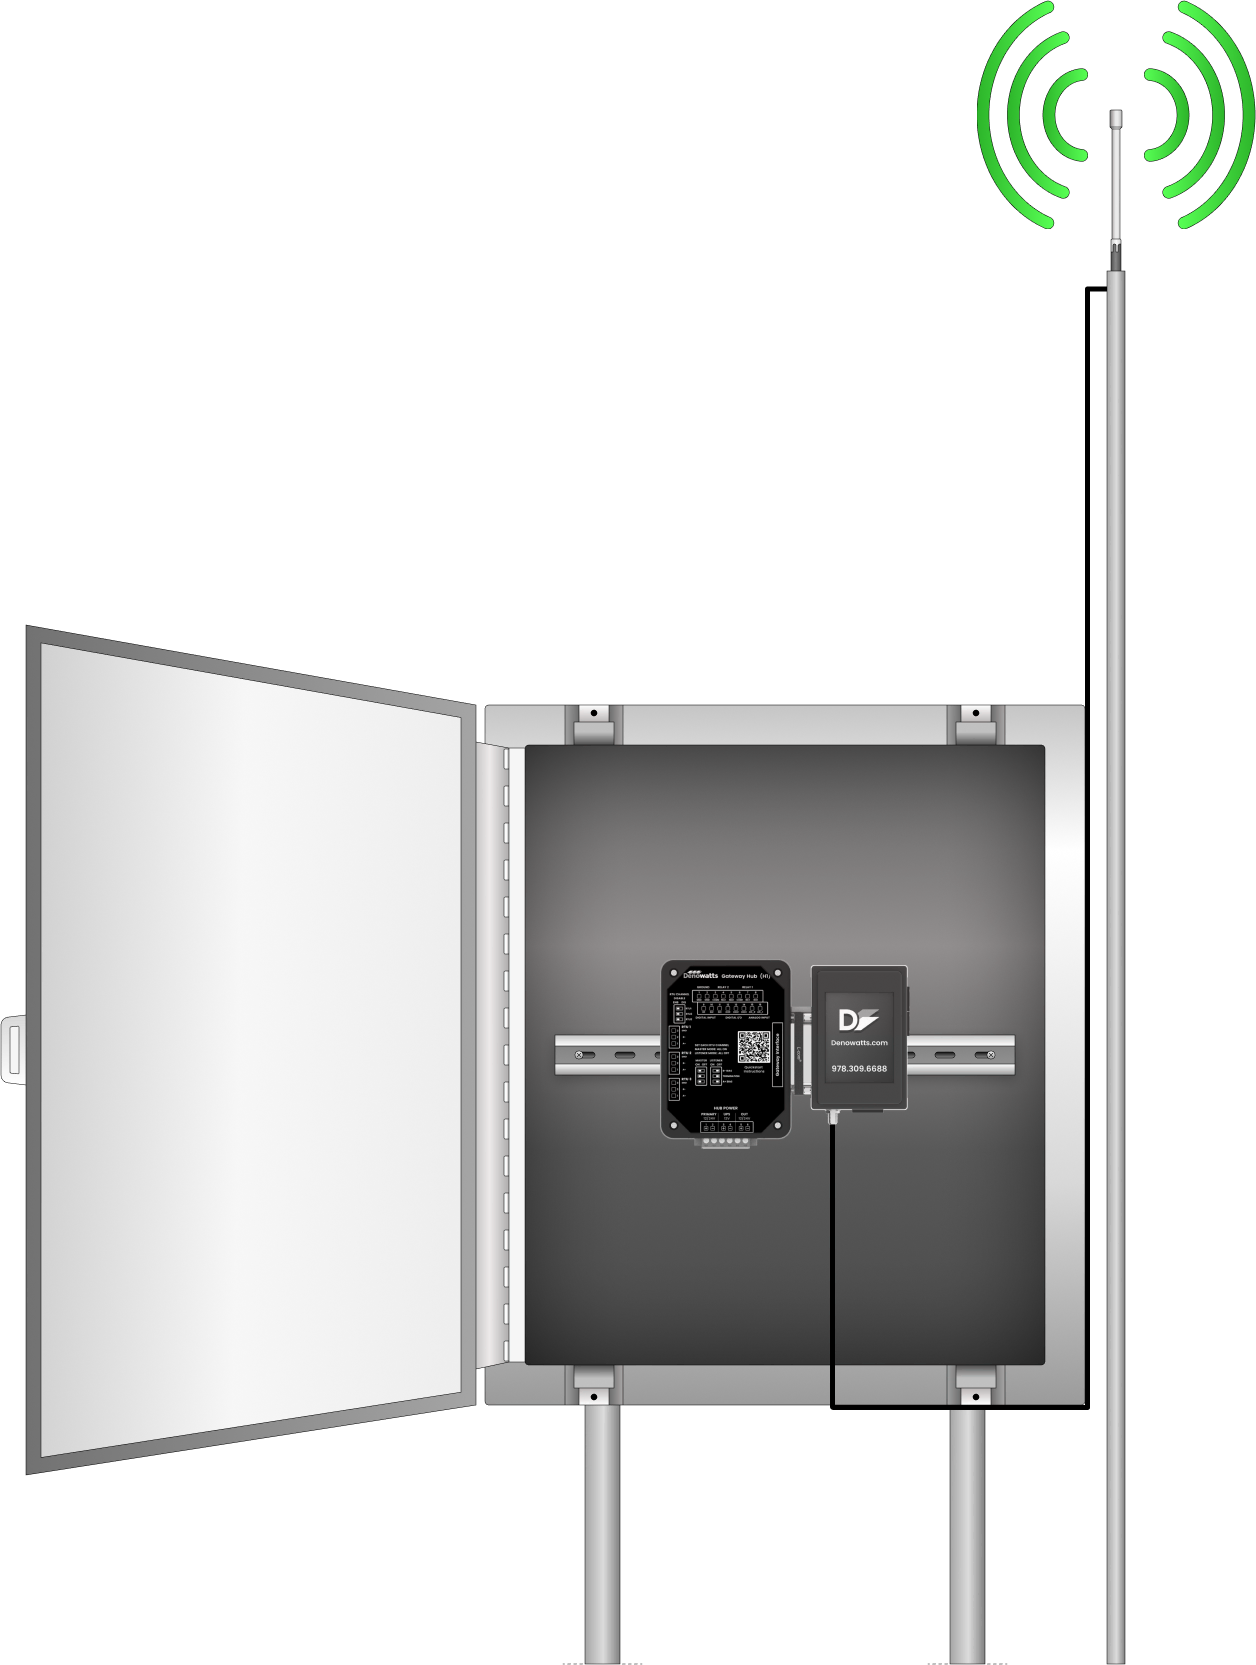
The gateway must be installed in a weather-proof (NEMA4) enclosure, which is typically the main DAS cabinet, and requires:
- 12-24VDC power supply (the Gateway and Hub draw ~3watts).
- Internet access (LAN via RJ45 cable).
Installation Steps
-
Mount the gateway on available DIN-rail space.
-
Connect 12-24VDC power to the Hub if supplied (Primary Power Terminals), or directly to the Gateway if no Hub is supplied ((+) lead is on the right, (-) is on the left).
-
If there is a UPS (uninterruptible power supply) onsite, wire the Denowatts gateway to be backed up by battery power in the event of a grid outage.
-
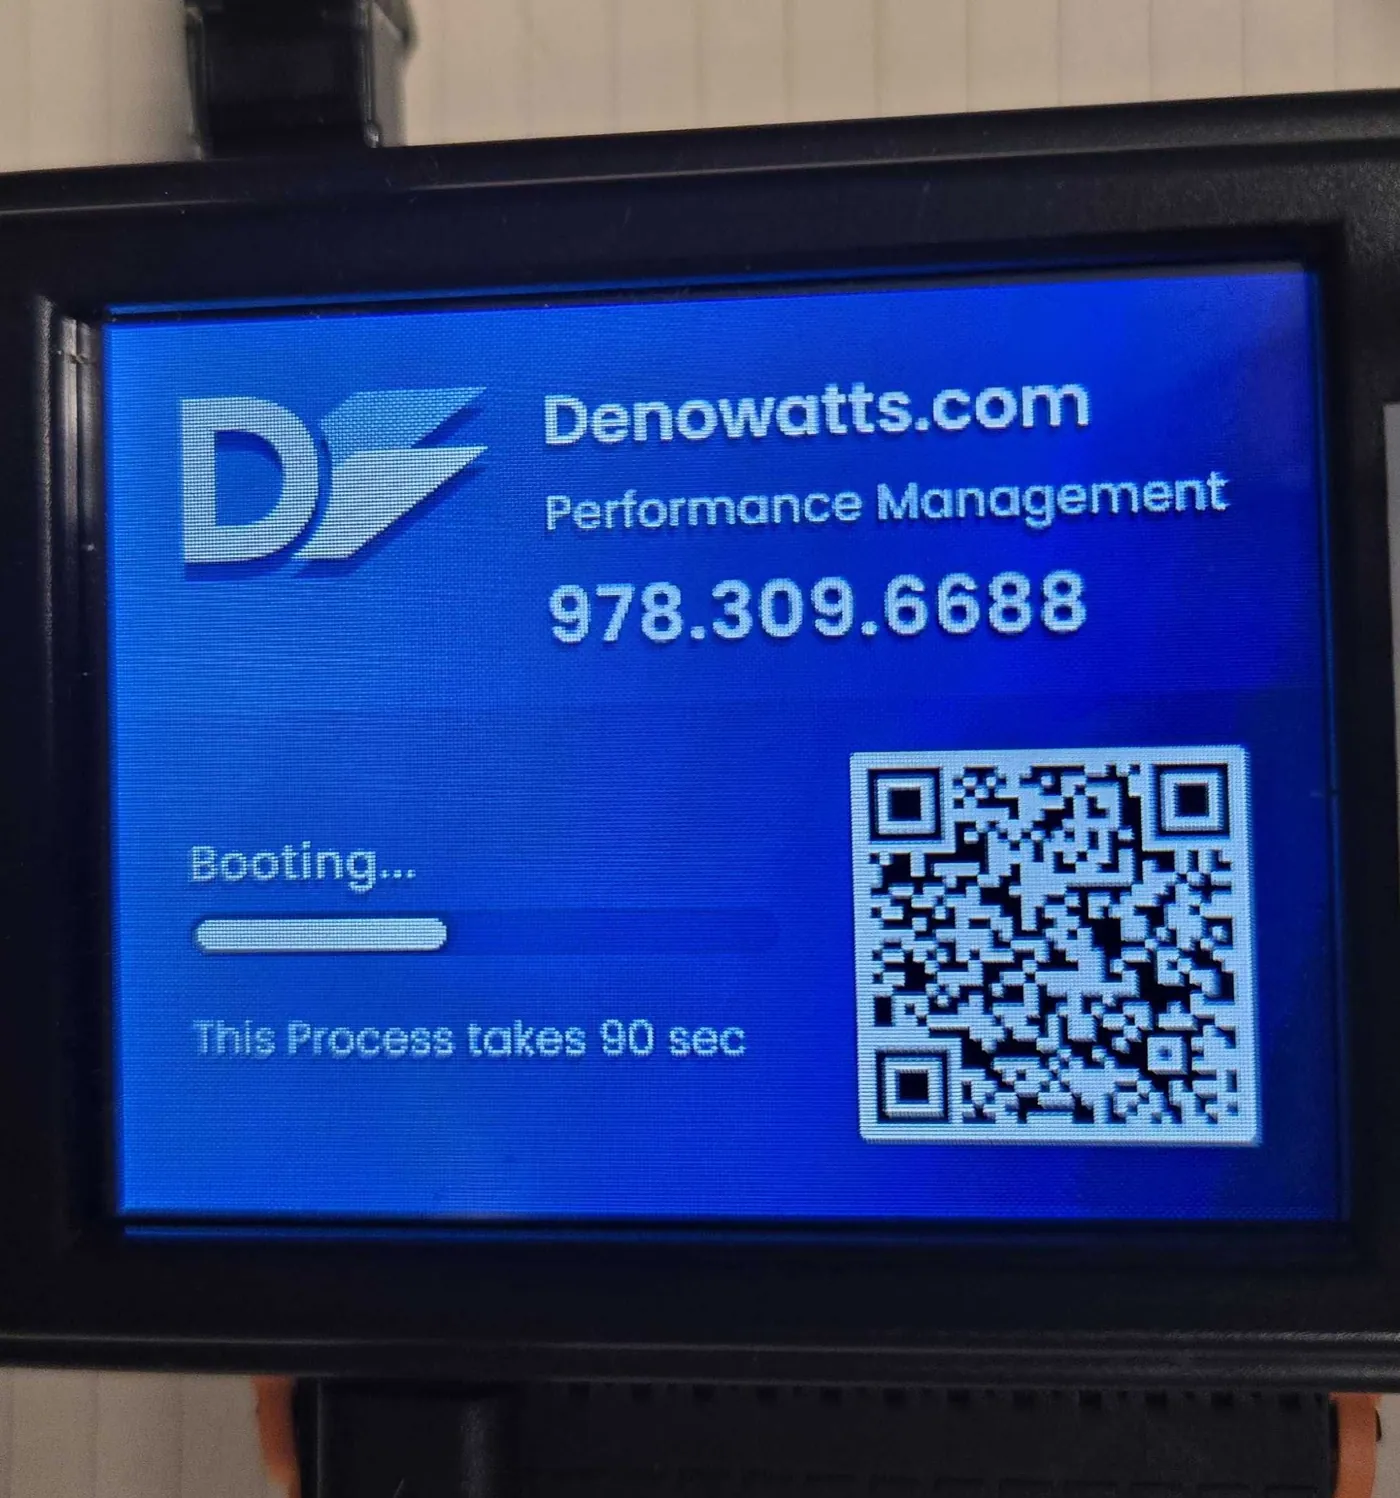
The LCD screen will start loading immediately after power is connected, and the Gateway will load in 90 seconds.
-
-
Using the Ethernet port labeled "LAN" on the gateway's right side, connect to the site's LAN switch within the enclosure using the provided Ethernet cable.
- Verify Ethernet status lights are operating (if network is configured).
- The proper status lights should be: Solid green (link), Blinking Orange (data transmission).
- If Denowatts provided a cell modem, connect the Ethernet port labeled with "WAN" to the cell modem with an Ethernet cable.
-
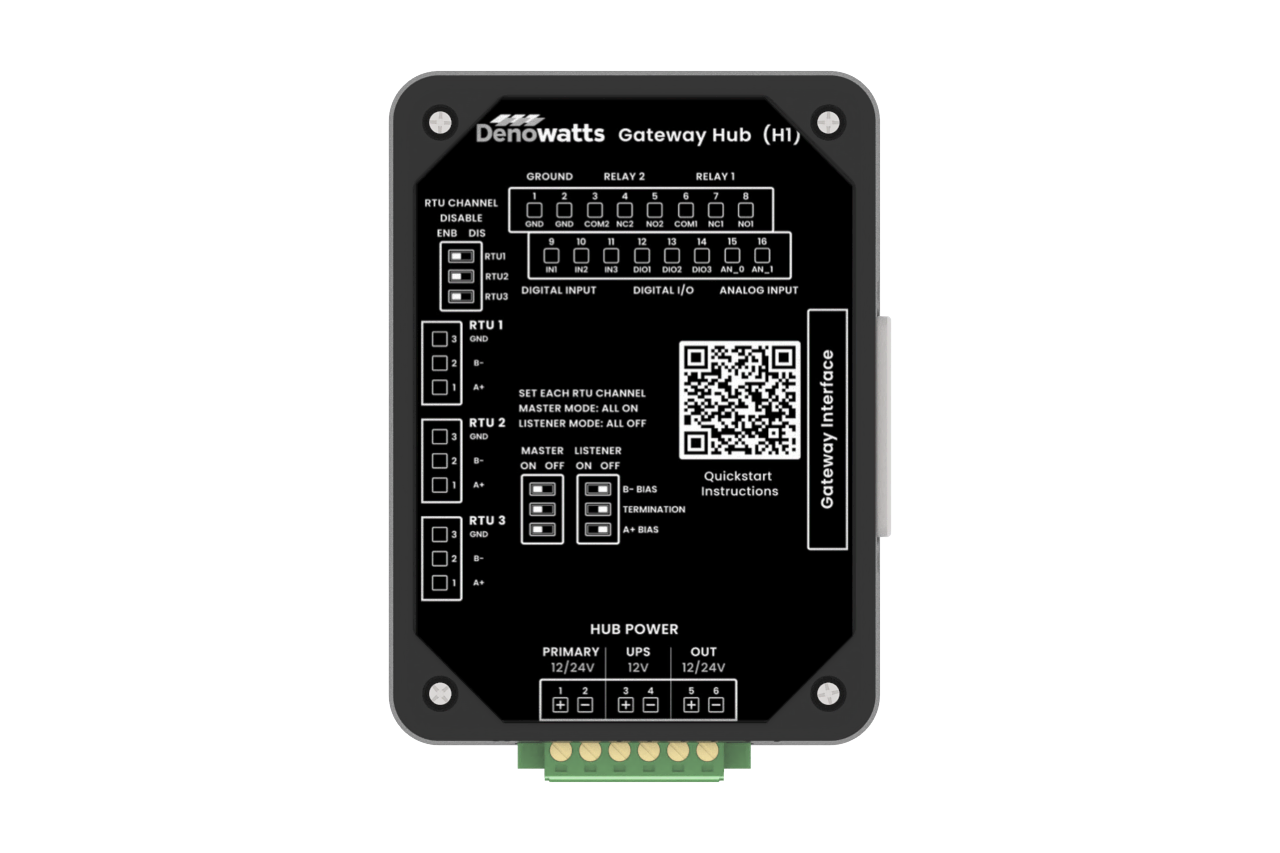
Connect the RS-485 serial loops from the HUB (RTU1, RTU2, RTU3) to the site's main production meter, and any other required modbus RS-485 loops. RS-485 wires only need to be connected if devices (meters, inverters, weather stations, etc) that communicate via modbus RS-485 are not modbus TCP. Call our support if there is uncertainty.
-
Download our PRODUCT CUTSHEET: GATEWAY (G3) + Hub (H1) for more detailed descriptions of the ports and their requirements.
-
Ensure RTU CHANNEL DISABLE dip switches are in the LEFT position (enabled) on ports where serial modbus RS485 wires are landing.
- Dipswitches are factory-set to the LEFT (enabled) position and generally don't need to be adjusted.
-
If Gateway is in Listener Mode (There are other dataloggers onsite), ensure RTU1/2/3 dipswitches are in the RIGHT position. If data is flowing, the RX lights will be blinking.
- Dipswitches are preconfigured per the site's specifications and generally don't need adjustment.
-
If Gateway is in Master Mode (Denowatts Gateway is the primary modbus master), RTU1/2/3 dipswitches are in the LEFT position. If data is flowing, the RX and TX lights will be blinking.
-
Dipswitches are preconfigured per the site's specifications and generally don't need adjustment.
-
-
-
Connect Antenna - see the following page for complete instructions.
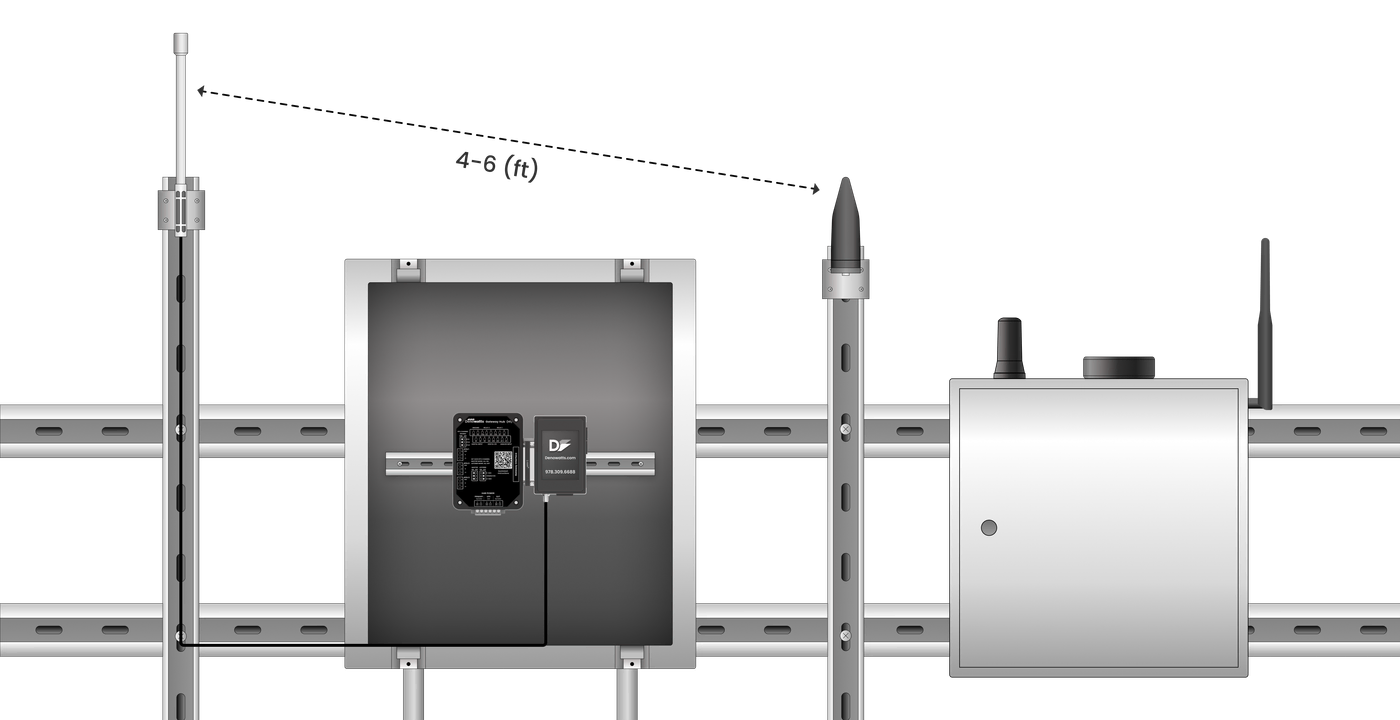
Example Images
Full DAS Enclosure
Leave the cables plenty of space and free of any tension that could damage the wires.
Gateway Menus
After 90 seconds of loading, the Gateway will load to the "live deno data" screen. This screen shows live deno data from the sensors that are checking into the gateway. It will automatically scroll through the number of sensors.
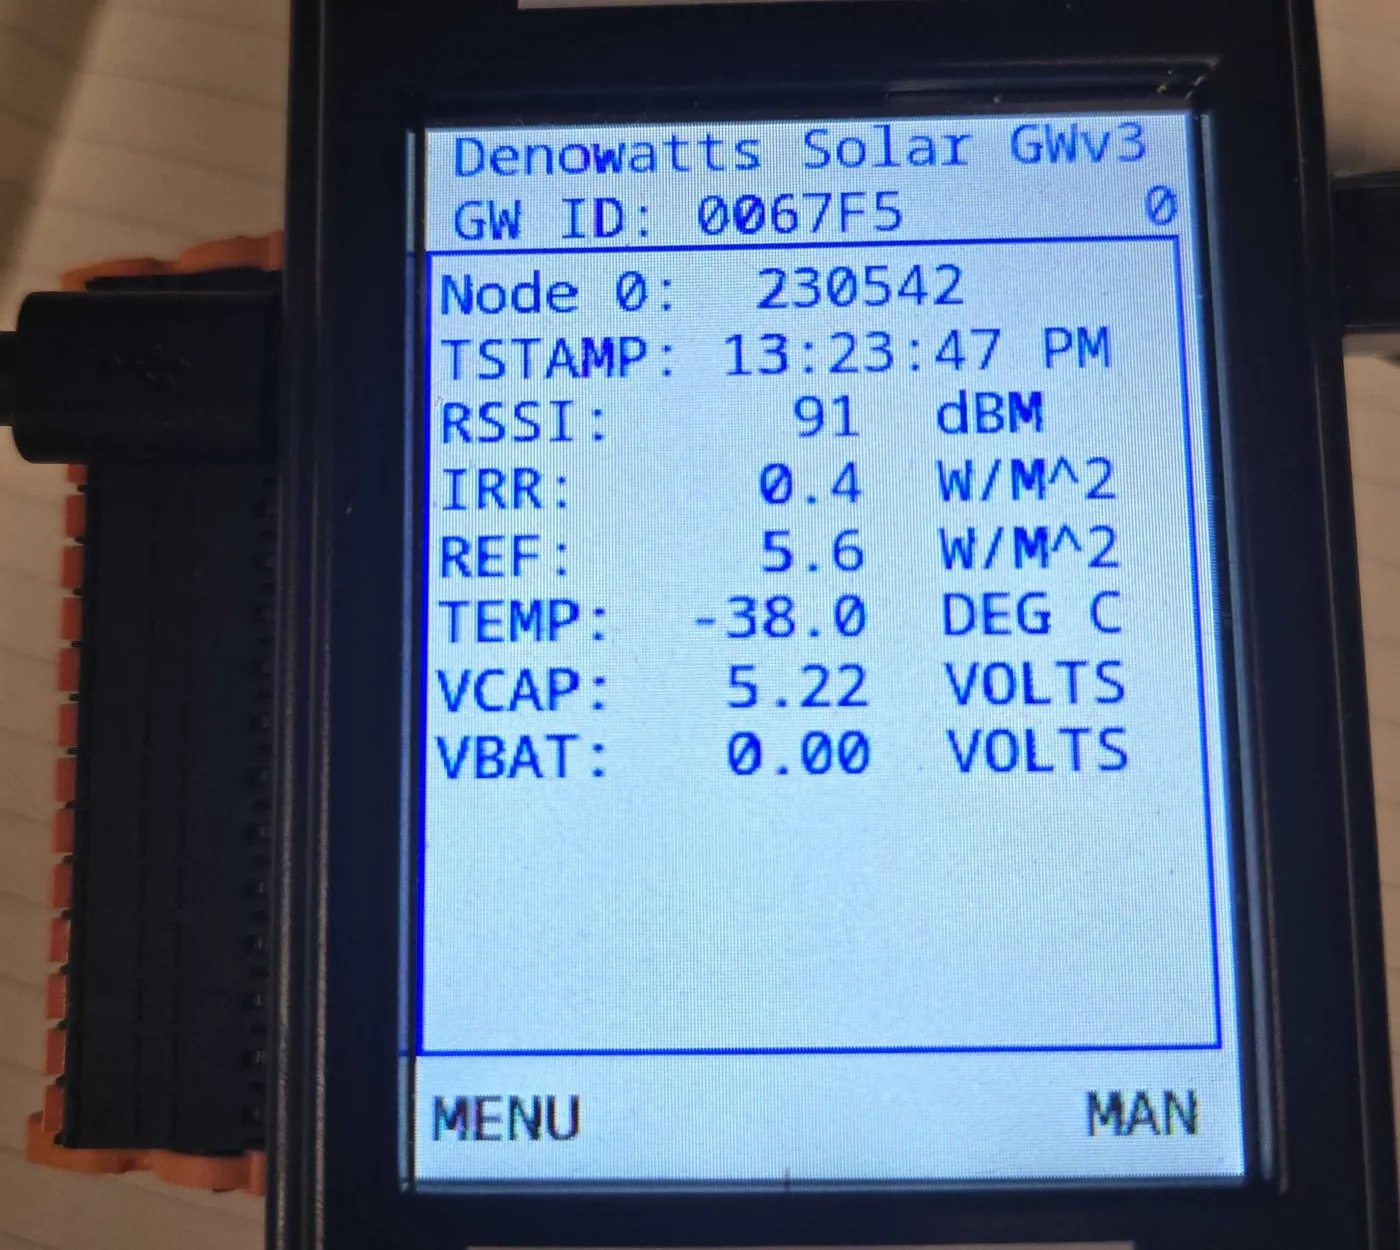
- To manually scroll the sensor list, click "MAN" then "Deno" scroll.
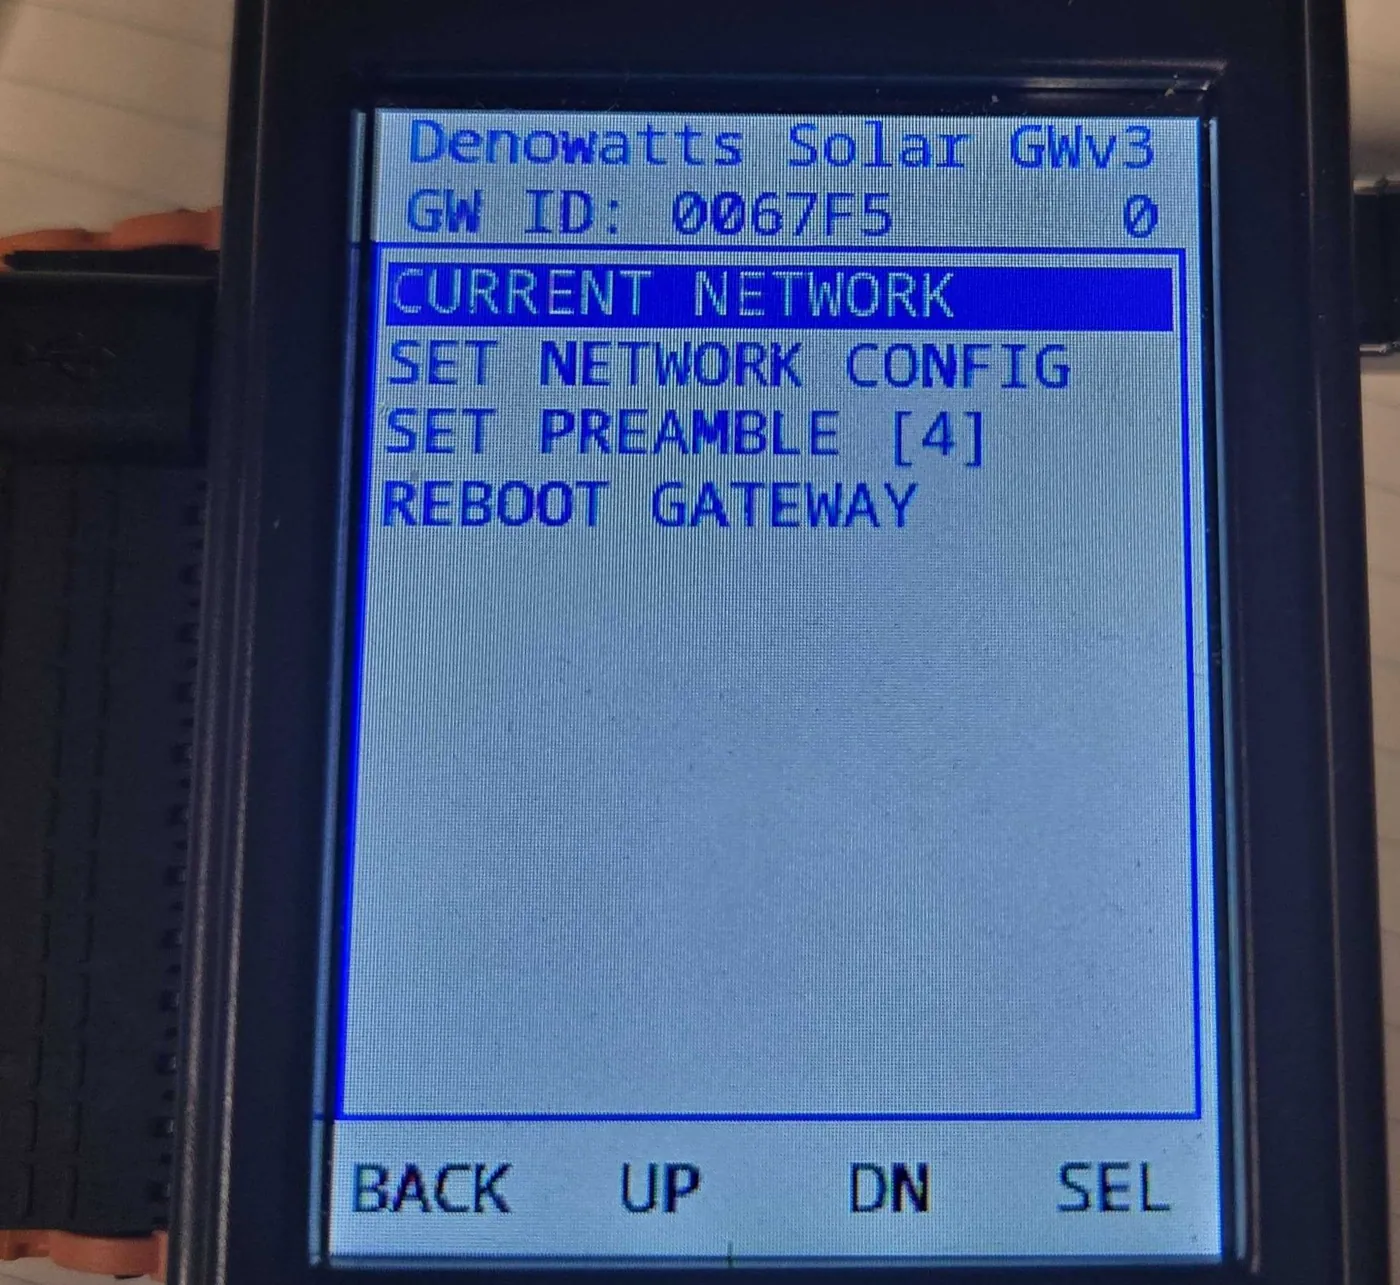
The Menu Page of the Gateway has the following options:
-
Current Network: view the gateway's current network settings. The default setting is in DHCP.
-
Set Network Config: allows the user to change network settings right at the device. See Network step for complete instructions.
-
Set Preamble: No changes necessary; leave as default. This is the radio channel that the Deno Sensors and Gateway Operate on. If there are multiple gateways/sites in close proximity, please call our support line to ensure Denos are communicating with the correct Gateway.
-
Reboot Gateway - turns off and back on.
Please contact Denowatts at any point while reading this guide with questions, comments, or concerns:
- By Phone: 978.309.6688 x1
- Email: support@denowatts.com
- Check out the Denowatts Support Center for more articles that dive deeper into our methodology and software.
Last updated on