
Download Mobile App
Denowatts provides a free mobile application available both on the Apple Store and the Google Play Store. Use the links below or search "Denowatts" in the app store on your mobile device.
Look for this Logo:

Considerations
-
Please create an account upon downloading and follow the prompts on the app landing page. If your company does not have a Denowatts login, please get in touch with our support channels.
- 978.309.6688 or support@denowatts.com
-
The Denowatts Gateway must be energized and fully connected to the internet to display live data.
-
If there is no internet access or firewall rules prevent the gateway from reaching Denowatts' servers, live data will not reach the app.
-
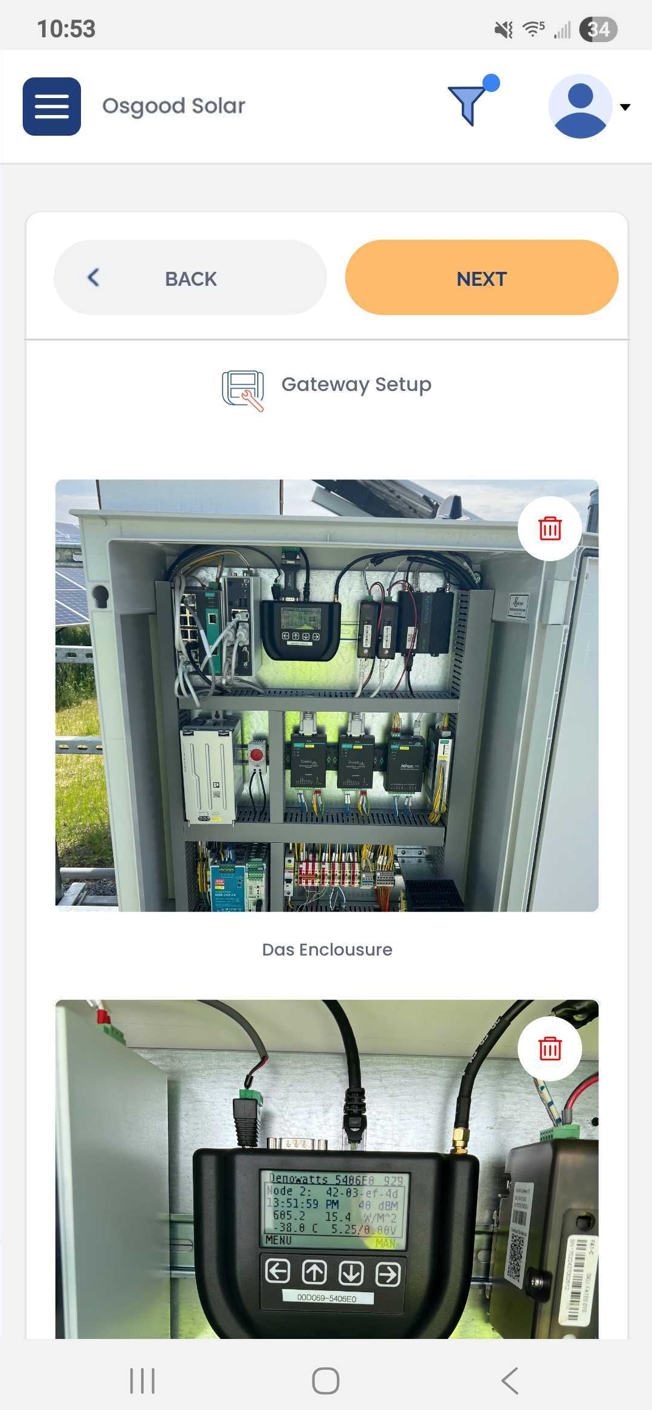
If the Gateway is energized but not connected to the internet, sensor communication can be verified on the LCD screen of the gateway, as shown here: Gateway Setup
-
-
To upload installation pictures to the app, Gateway energization and connectivity are not required—just decent cellular service.
- If cellular service is not optimal, pictures can be uploaded later.
Field Setup
The Denowatts mobile app is designed to optimize the commissioning process. The primary features of this app are to upload pictures of the equipment installation and verify data and communications.
1. Sign In
-
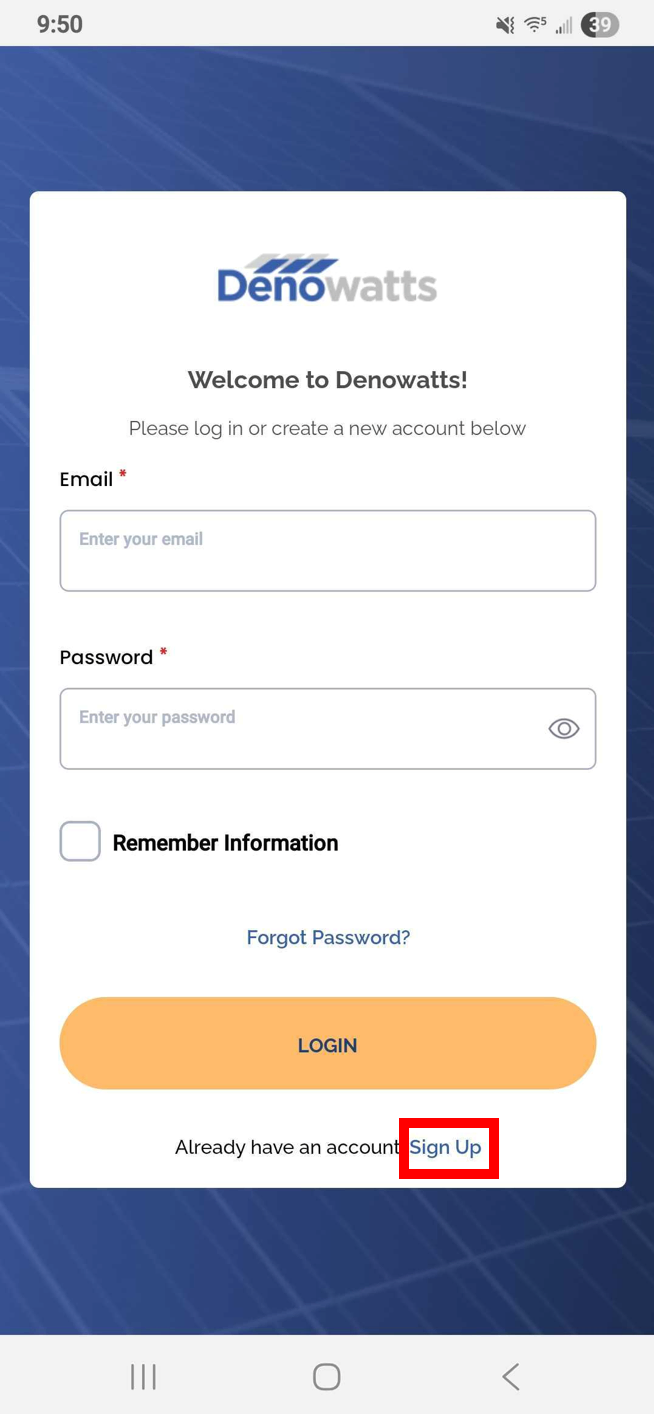
After the app is downloaded, please sign in to your account. If you do not have an account, follow the prompts to create one. If your company is not registered with Denowatts, please get in touch with our support channels.
2. Select Site
-
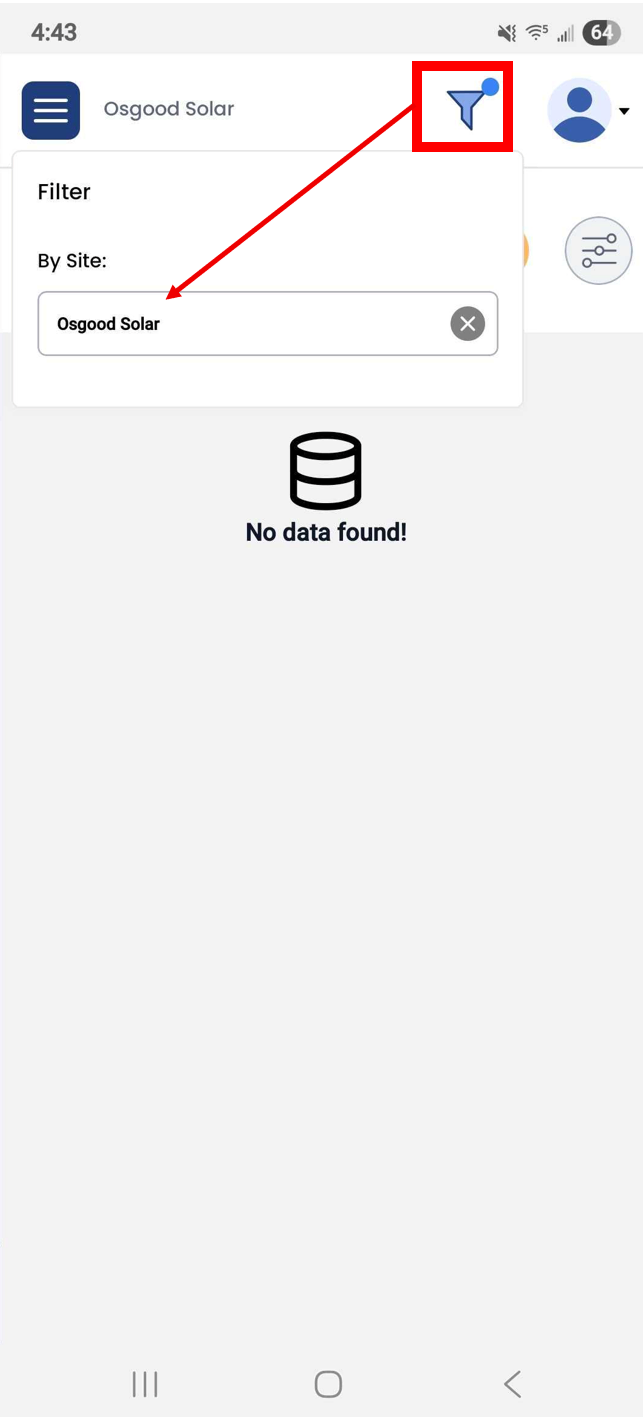
Using the filter icon in the upper right corner, select the site being commissioned or worked on. If you do not have access to the site you are on, you can skip this step.
3. Open Field Setup
-
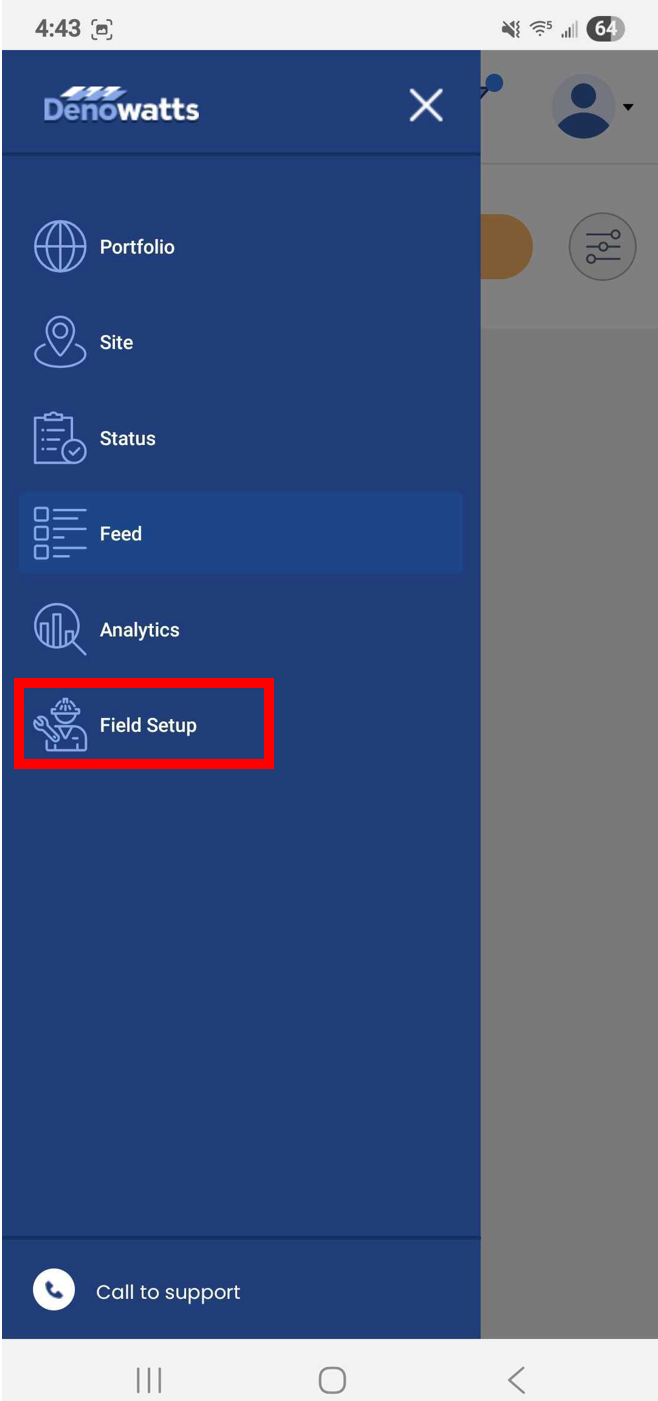
When a site is selected, use the button in the upper left corner (3 horizontal lines) to open the menu and select "Field Setup."
4. Select Gateway
-
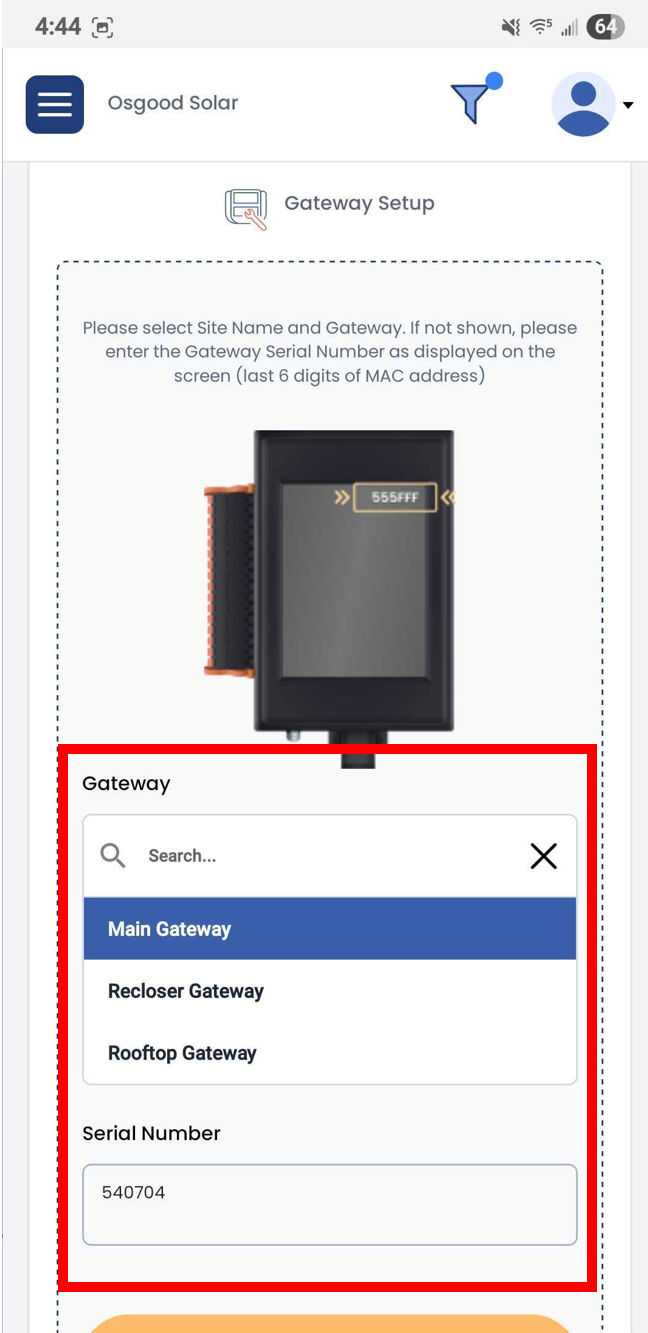
On the Field Setup page, select "Start Now." The next step is to choose the Gateway you are commissioning.
-
If you selected the site in step 3, the gateway will appear in the drop-down menu; if not, enter the gateway's 6-digit serial number in the serial number field.
-
Most sites have only one Denowatts Gateway; if there is more than one, ensure the correct serial number is selected.
-
Verify the Gateway in hand matches the serial number in the app.
-
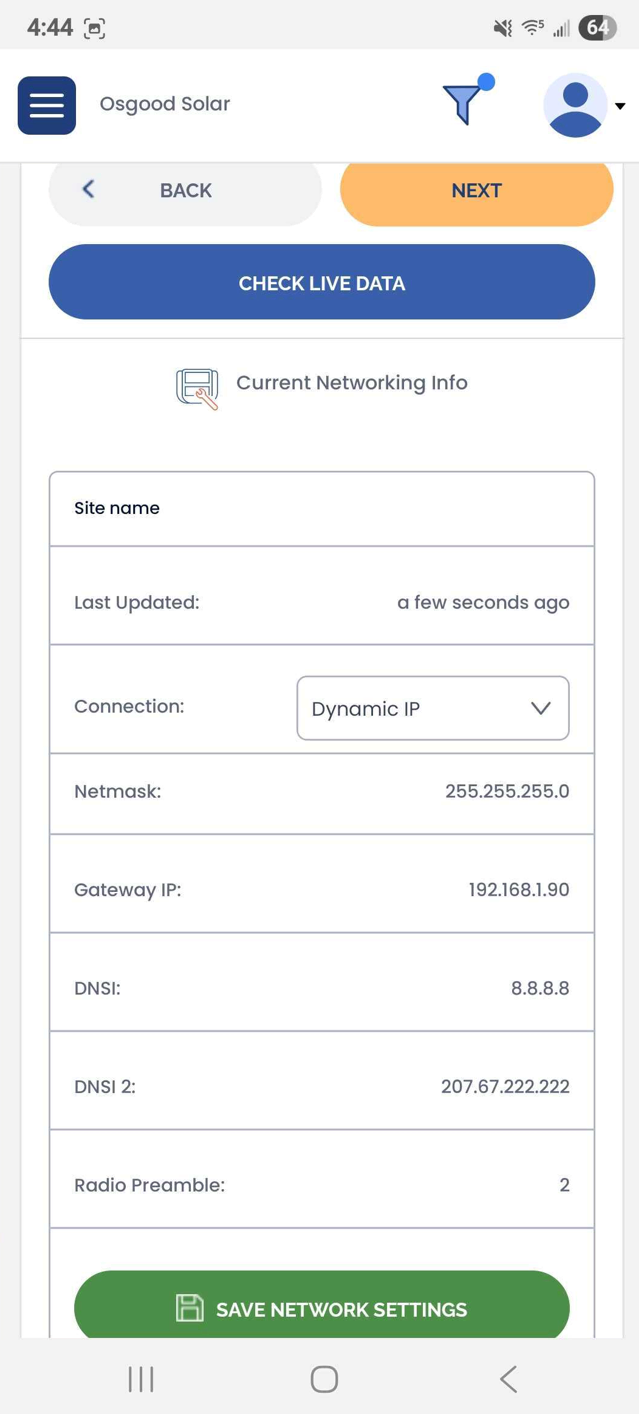
5. Network Info Page
-
When a gateway is selected, the next page is the Network Information page. This is where you can see the Gateway's current connection status and network settings.
-
If the network settings need to be changed (in most cases to a static IP), verify with your network administrator what they should be, and adjust them on this page.
- **If the Gateway is not connected to the internet, please set the LANIP settings via the prompts on the Gateway's Touch LCD Screen
-
If you do not know the network settings or network administrator, please leave the Gateway network settings unchanged.
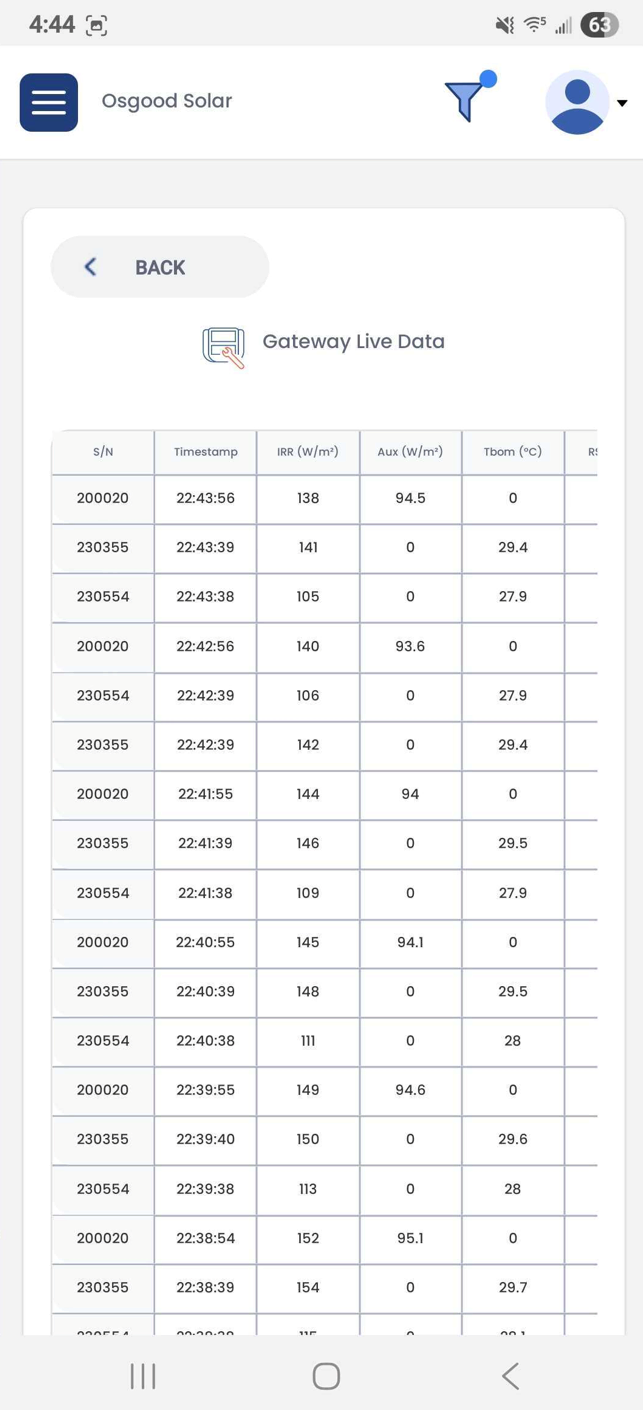
6. Gateway Live Data
-
On this page, the installer can see any live data from Deno sensors that are checking into the Gateway. It is a good spot to verify sensor communication before installing it at the final locations. Timestamps are UTC.
-
If the Gateway is not connected to the internet, please use the Gateway Touch LCD screen to see which sensors are checking in.
-
7. Gateway Photos
-
Whether or not the gateway is online, the installer can still upload photos of the gateway's installation. Ensure the following before documenting.
-
Wired up to 12-24 VDC power
-
Connected to the local network via Ethernet cable
-
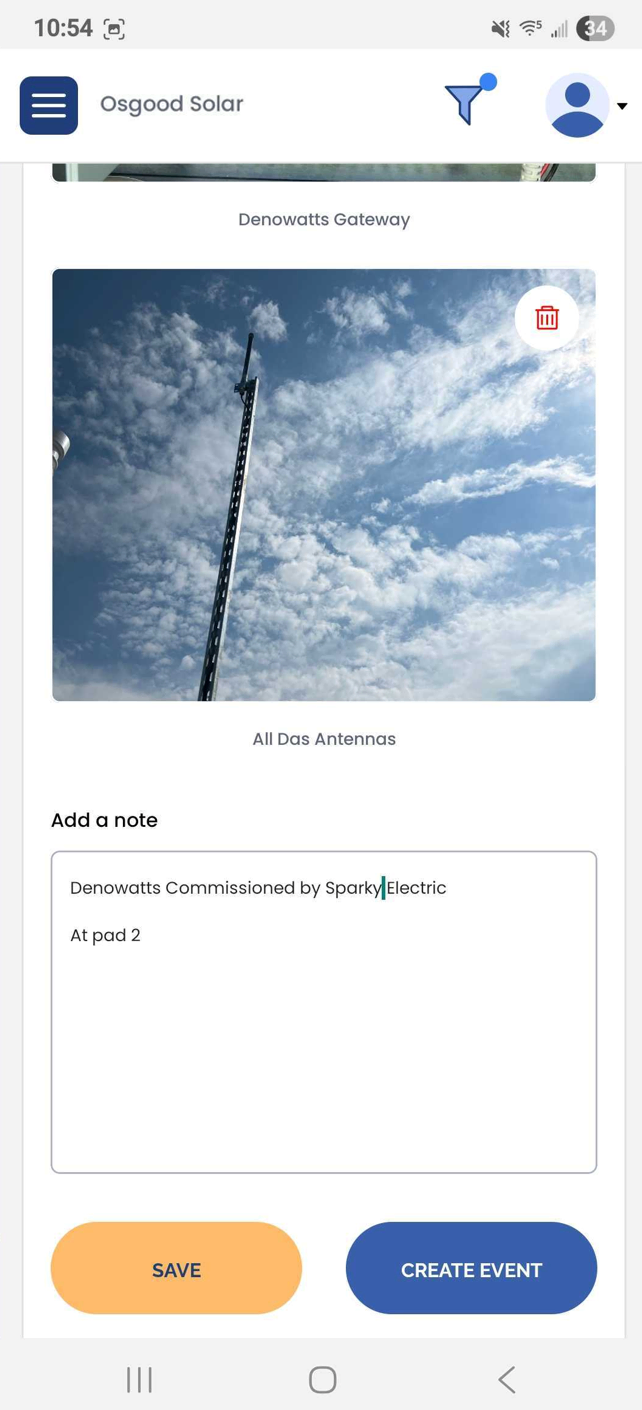
Antenna is installed as high as possible in vertical orientation and 4-6ft away from other antennas (i.e., cell modem, trackers, GPS, etc)
-
Any RS-485 wiring/adapters are installed and tidy.
-
Follow App prompts for which pictures to take: examples below
-
Save any notes, and create an event for Denowatts to review.
-
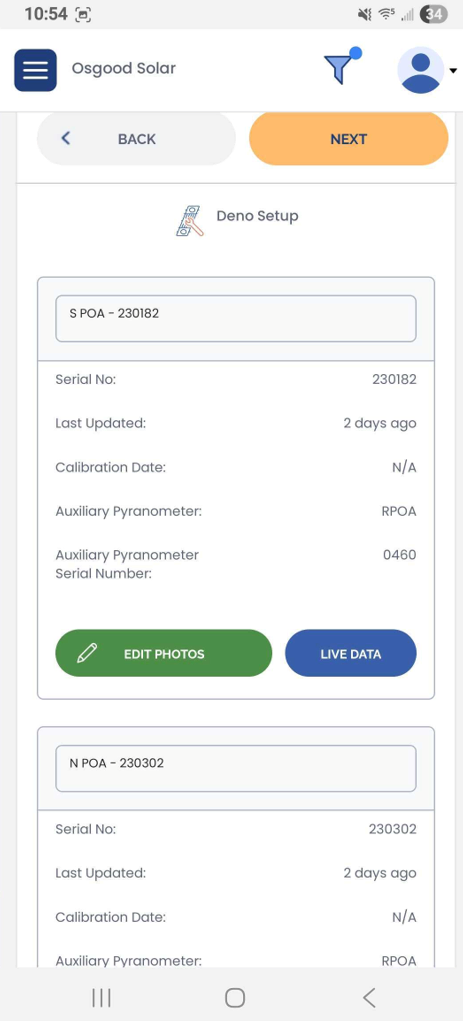
8. Deno Setup
- This page shows the installer all the Deno sensors pre-configured on the site by Denowatts. From here, you can either check the live data of each Deno sensor or start uploading installation photos.
9. Deno Photos
-
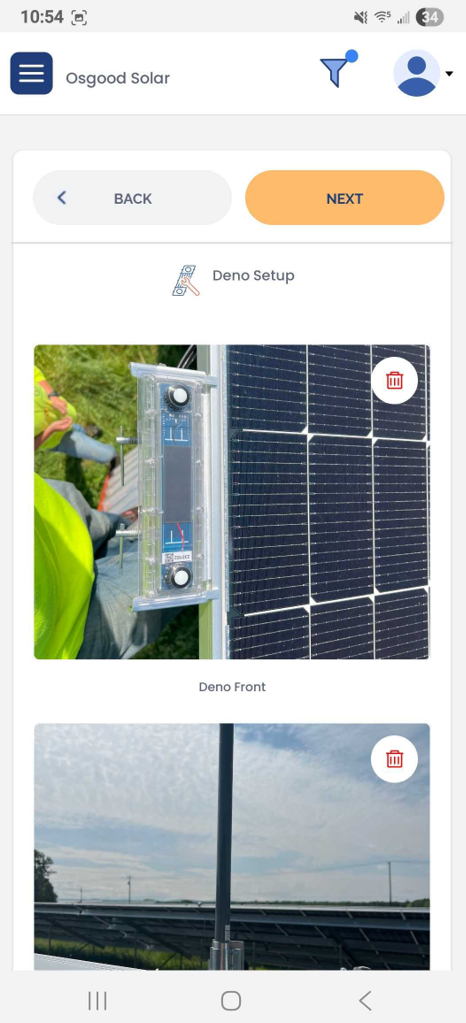
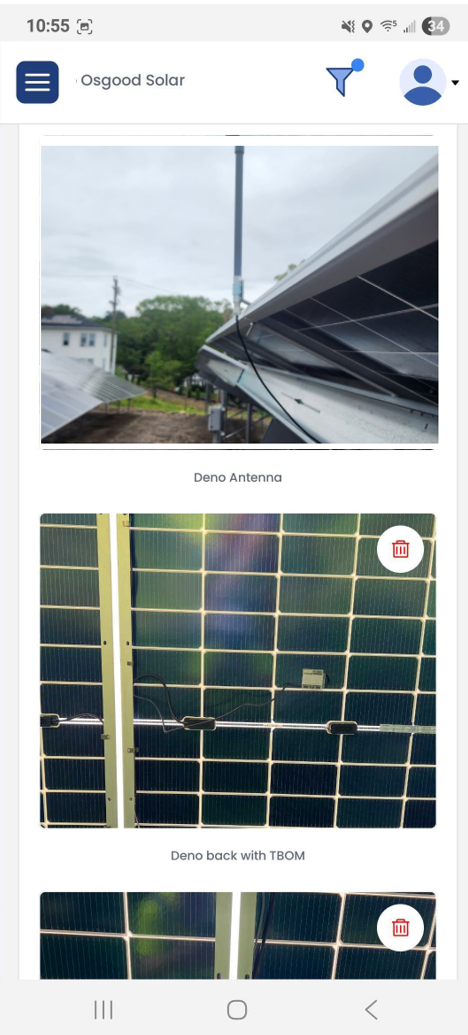
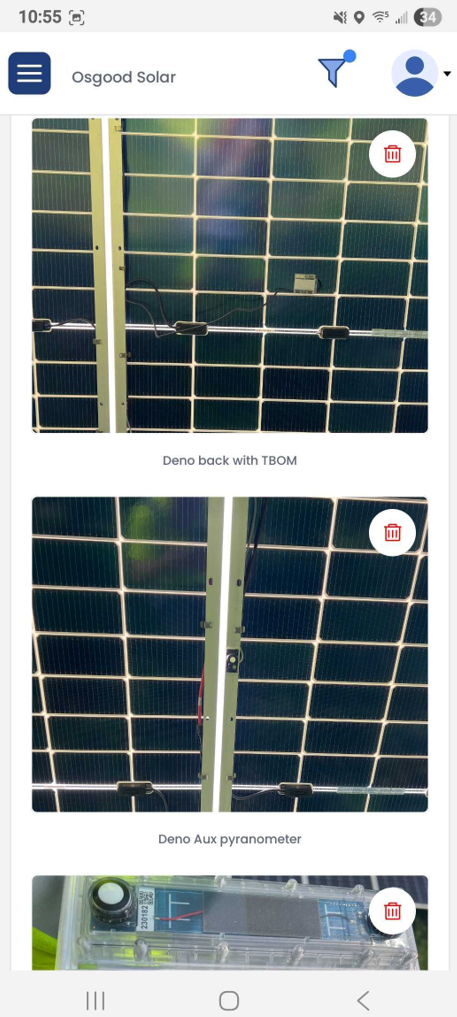
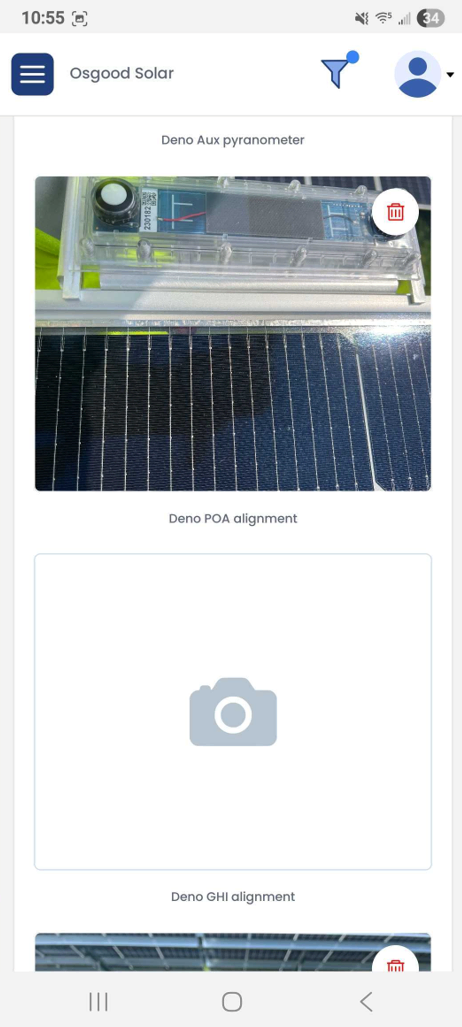
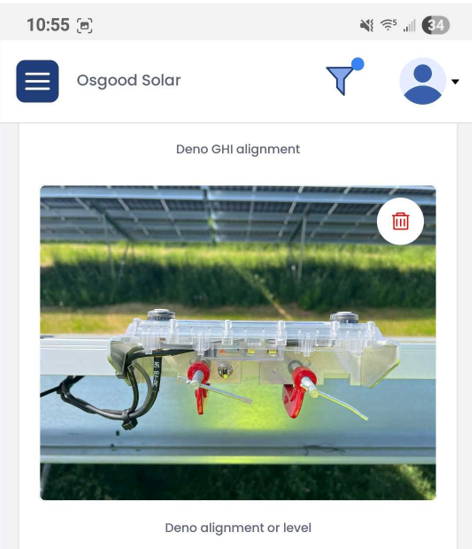
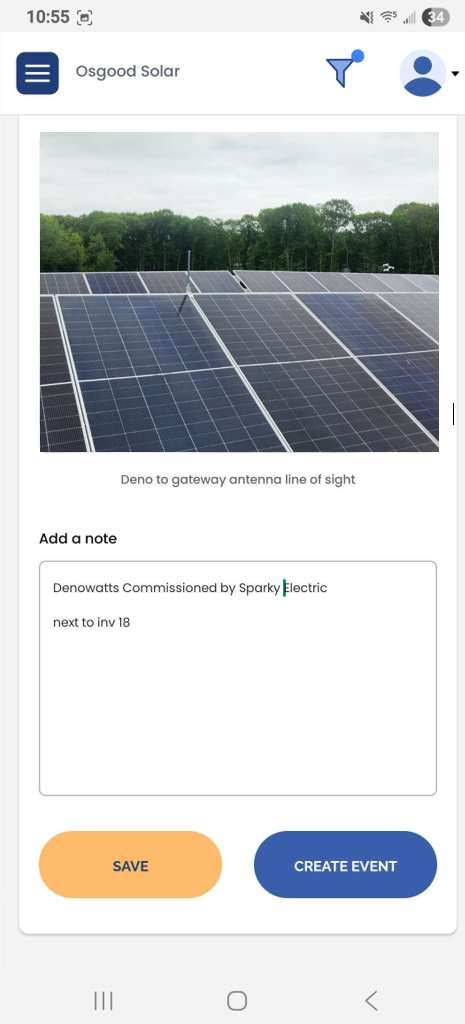
Follow the app's picture prompts and upload the required pictures of each sensor. Ensure photographs are clear, and follow the examples below. Not too close, and not too far.
- GHI photos can be ignored for POAs and vice versa
-
Mark specific sensor location notes.
10. Verification
-
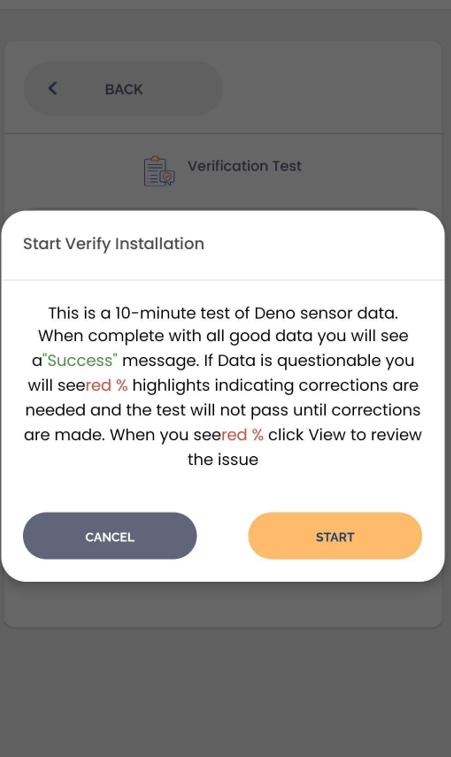
This step helps verify the sensor data, ensuring radio strength is acceptable, irradiance readings are within tolerance, and temperature sensors are accurate.
-
This step will only work if the Gateway is connected to the internet
-
Once this step passes or fails, please give Denowatts support a call at (978.309.6688), and we can start the next steps to verify the installation and configuration of the system.
Last updated on