
rPOA
How to properly install the Denowatts rear-side, or back-side pyranometer (rPOA, bPOA). This was previously covered at a top level in the POA Deno section; however, more detail will be covered here.
The rPOA (rear-Plane-of-Array) sensor is a critical piece in assuring an accurate benchmark.
Terminations
The rPOA sensor is labeled in the picture below
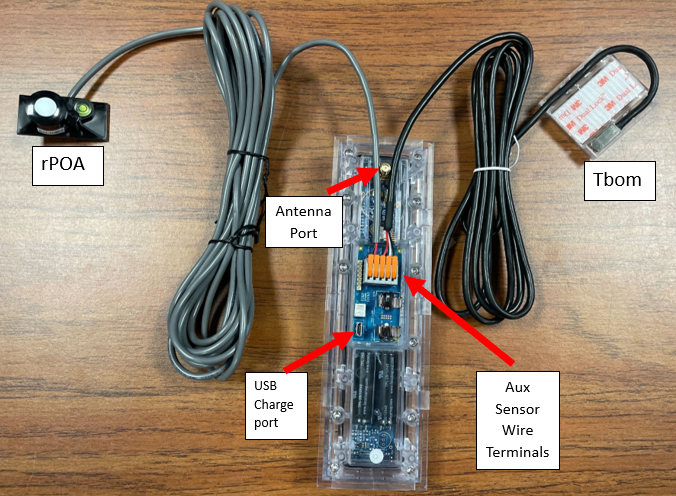
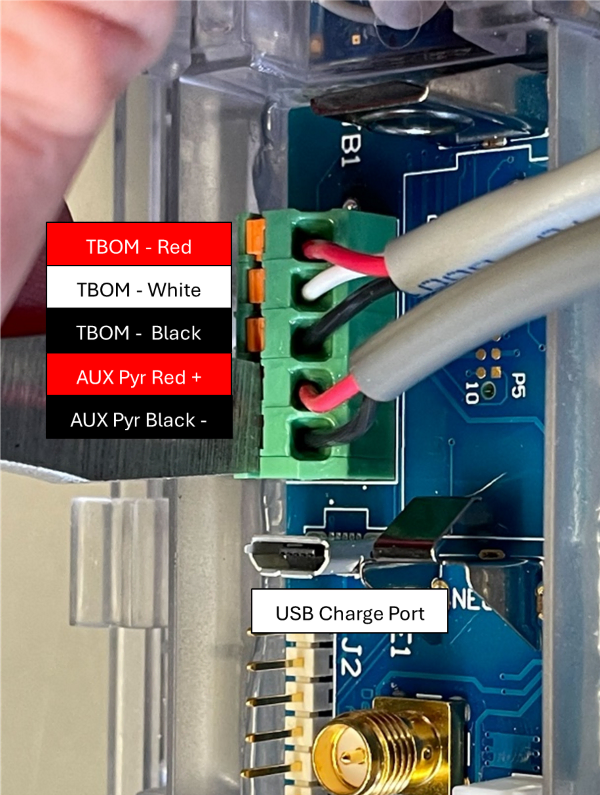
Please check that the rPOA wiring terminations correspond with the Aux Pyr terminals image below
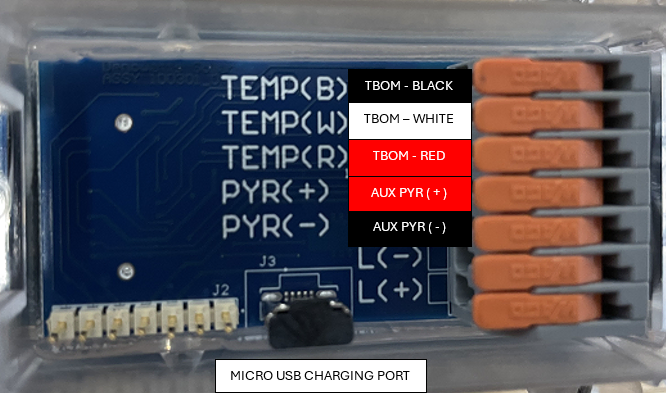
If you are replacing an old rPOA on a Deno 4.2 or 4.3, use the image above. If you are servicing a rPOA on Deno models 4.0 and 4.1, use the image below.
Installation Steps
1. Locate Sensor
Locate the back of the rPOA sensor on the back plane of the array. rPOA cannot be installed on perimeter panels.
- Tracker: Must be 16 feet from the end of a row and not on the first or last row of the array. Sensor mounts to the bottom of the torque tube.
- Fixed Tilt: Must be 16 feet from the end of a row and not on the first or last row of the array. The sensor mounts two-thirds of the way up from the bottom of the array.
2. Clean Mounting Location
Clean the Tbom location with the provided alcohol prep pad and then completely dry it with a cloth.
3. Apply Dual Lock
Apply dual lock to the desired surface, ensuring the entire surface is adhered to the surface
4. Fasten rPOA
Fasten the rPOA mechanism via mating dual.
5. Wire Management
Tidy up any remaining cable with zip ties and wire clips away from sharp edges, moving tracker parts, and DC homerun cables.
6. Pictures
Please document the entire installation with several photos
Example Install Pictures
Tracker System
**In the graphic below, you will see that the rPOA is mounted at least 3 modules in from the end of the row, and on the bottom of the torque tube.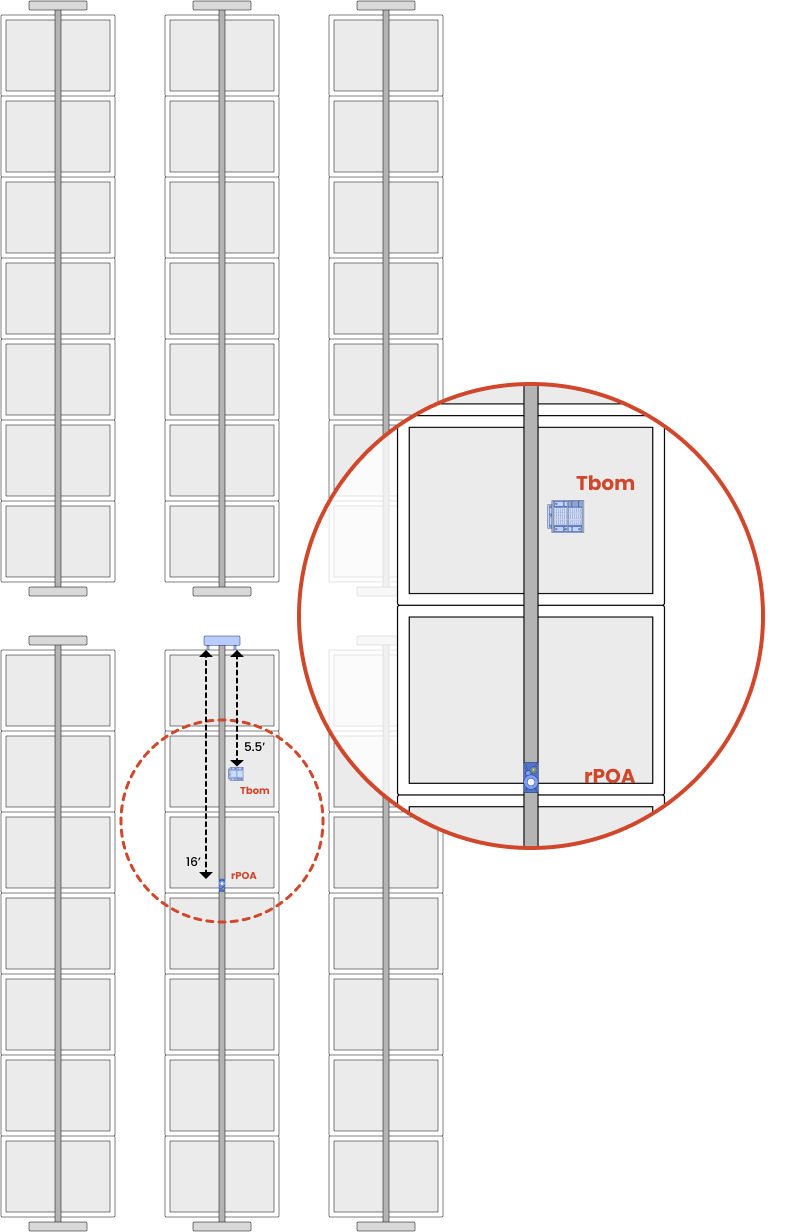
Below is an example rPOA installation. It is appropriately located at the bottom of the torque tube in the rear-side plane of the array, at least 3 modules in from the end of the row, and the wires are appropriately managed. 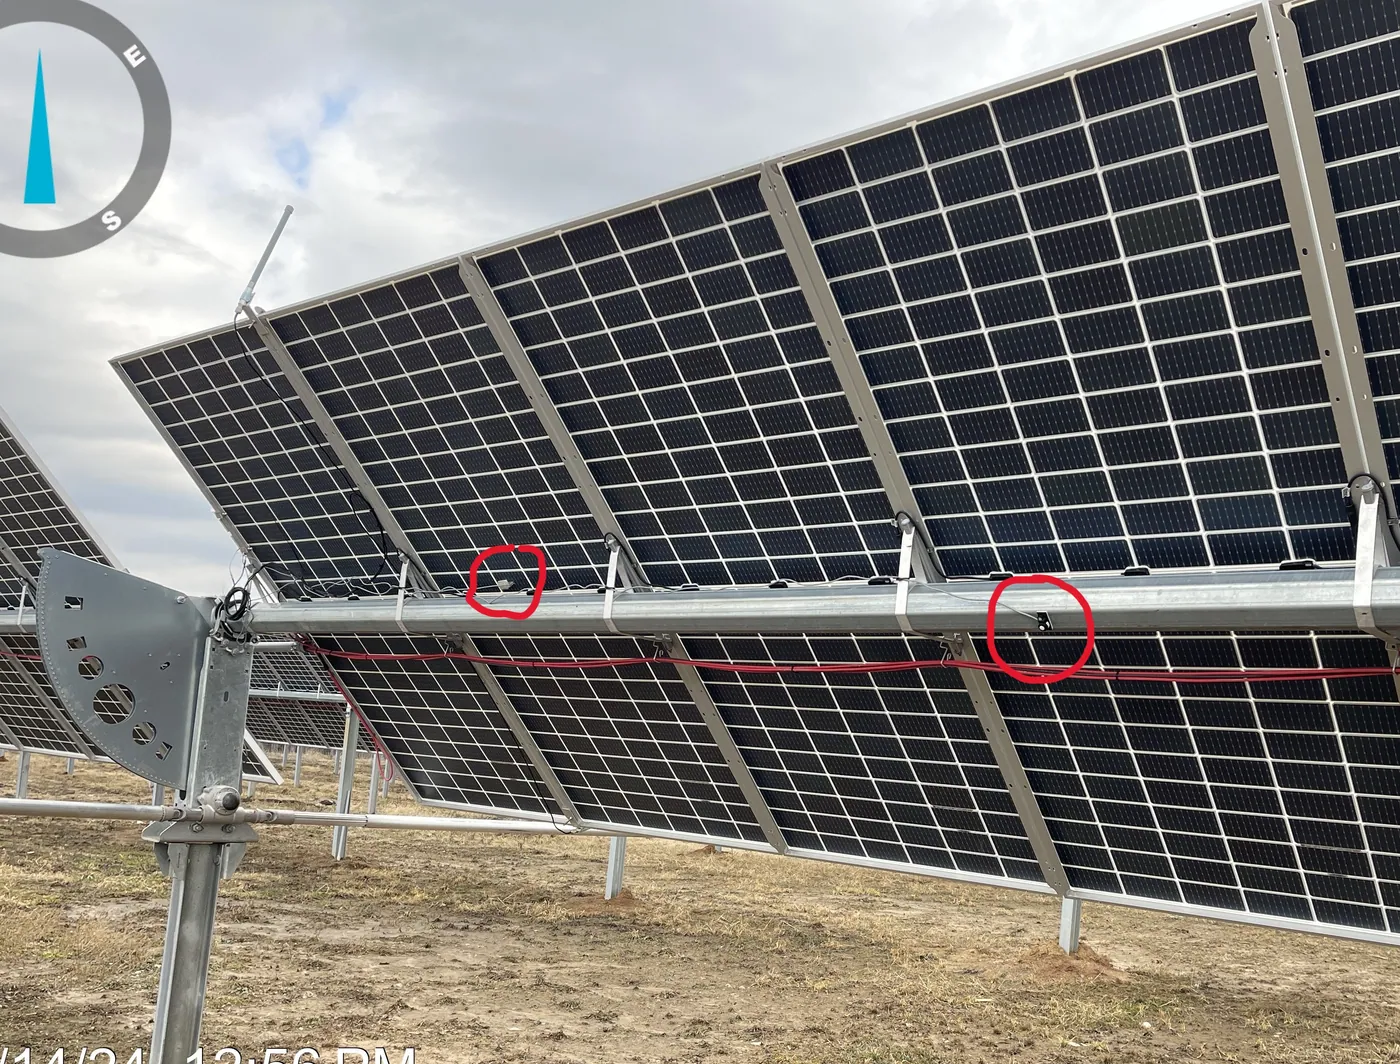
rPOA on round Torque Tube:
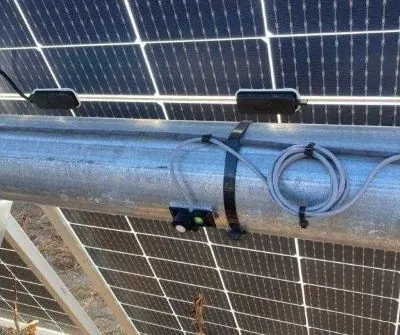
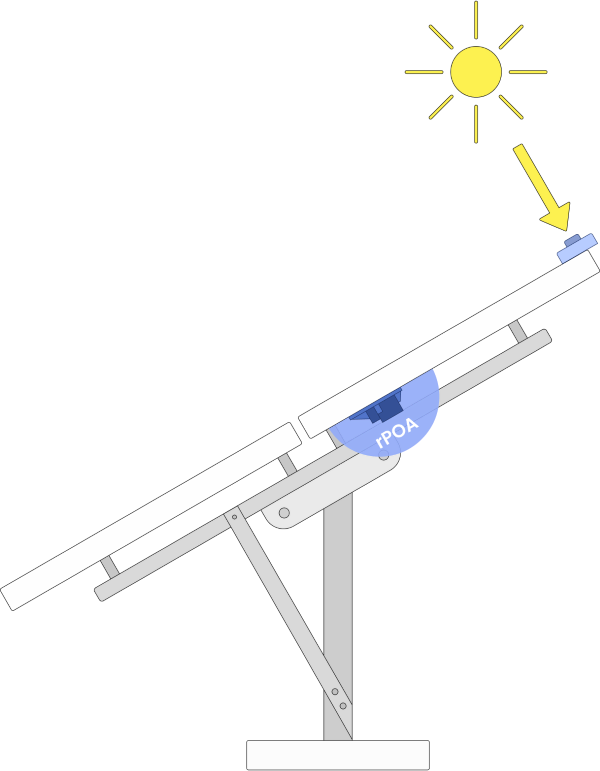
Example graphic or tracker rPOA mount: 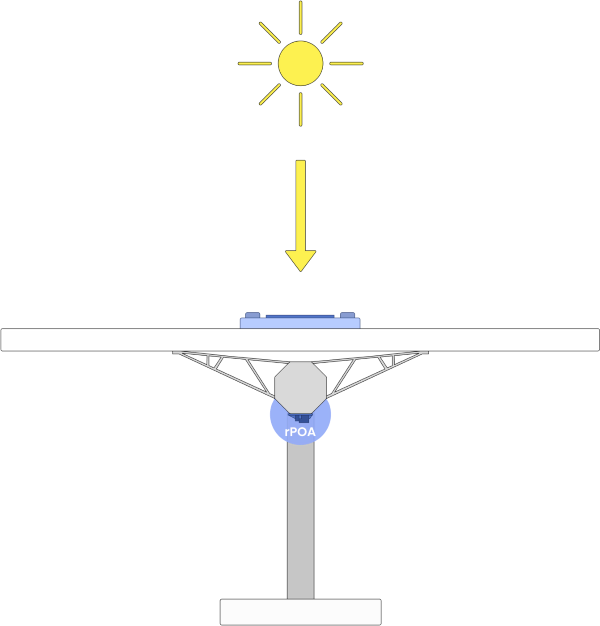
Fixed Tilt
Example installation of rPOA on a fixed tilt array. Notice how the device is mounted 2/3rds up from the bottom of the array:
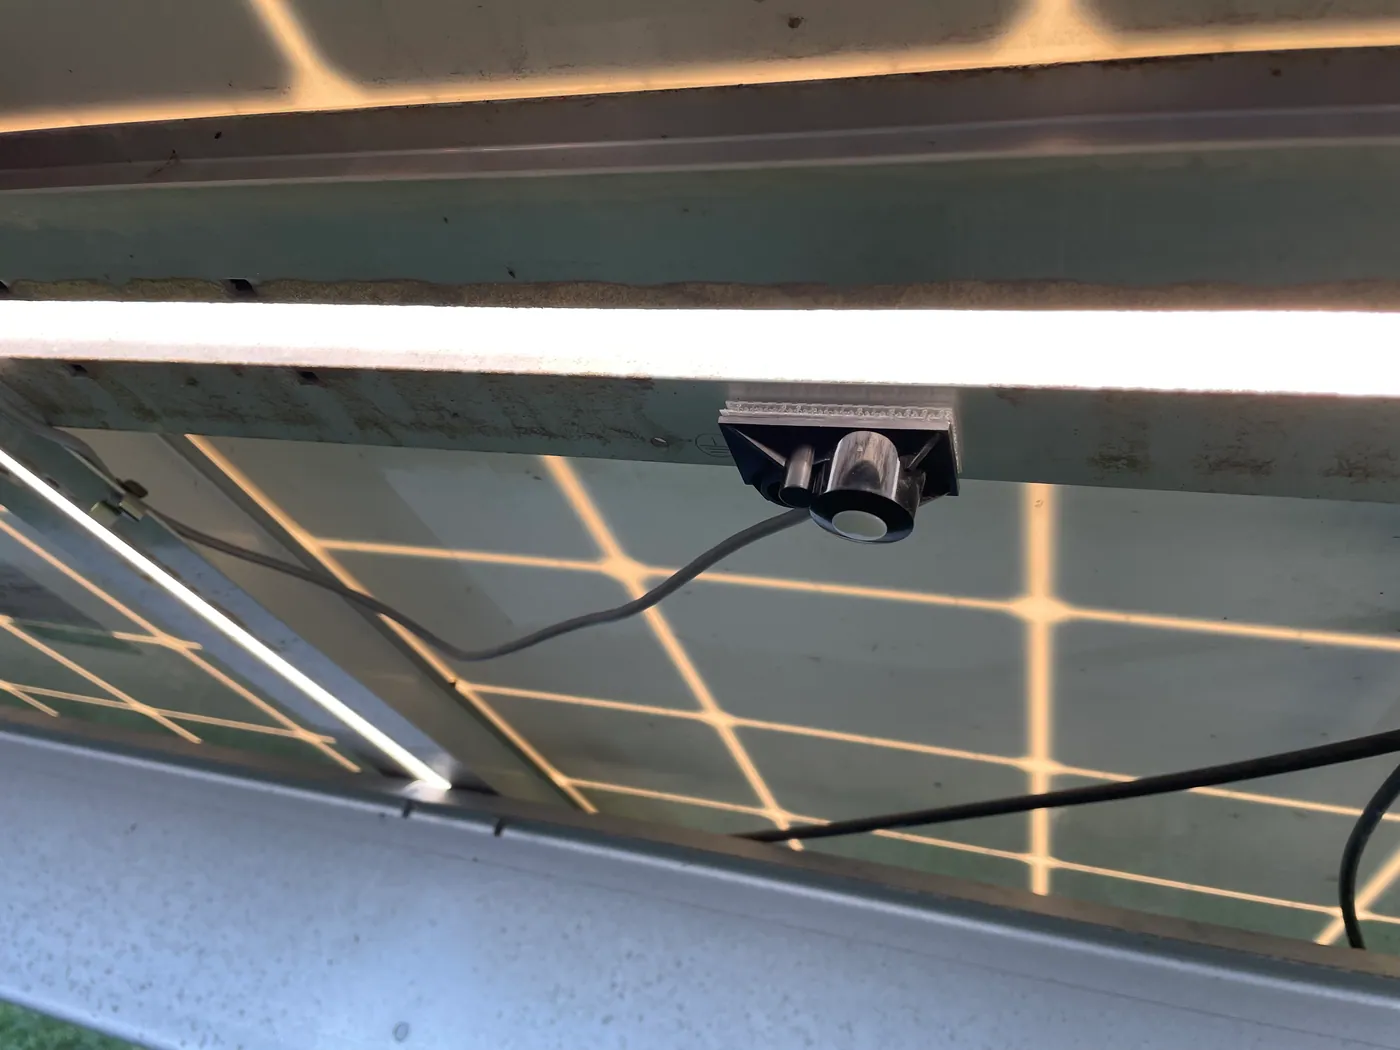
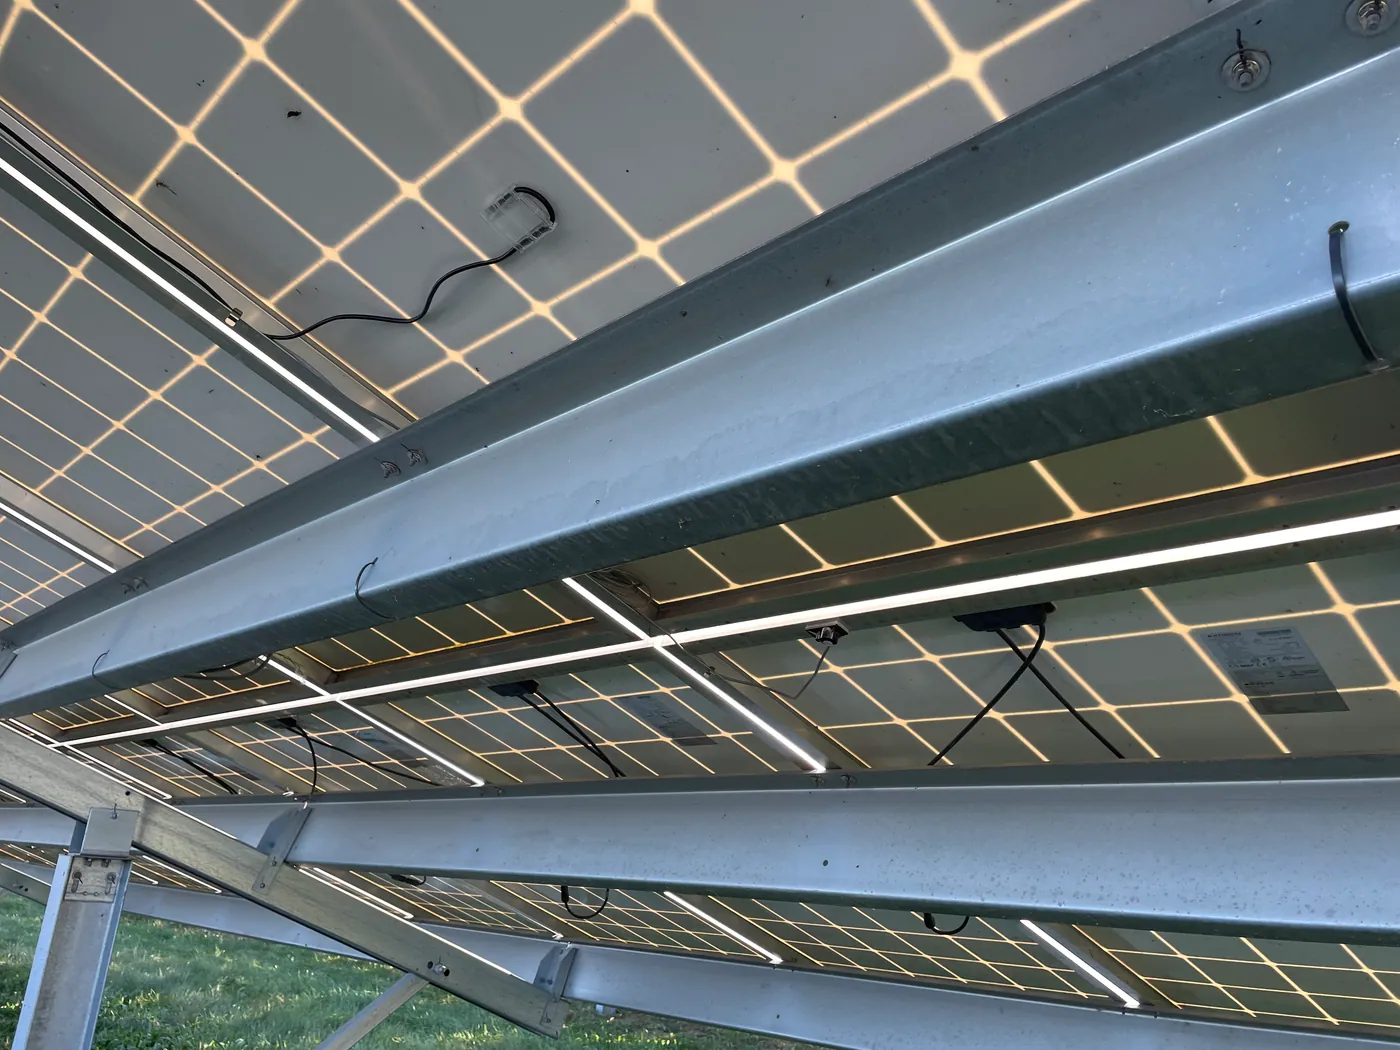
Example graphic of fixed-tilt rPOA mount:
Please contact Denowatts at any point while reading this guide with questions, comments, or concerns:
- By Phone: 978.309.6688 x1
- Email: support@denowatts.com
- Check out the Denowatts Support Center for more articles that dive deeper into our methodology and software.
Last updated on