
ETport
The Elkor ETport is a protocol converter that converts modbus RTU/RS485 protocol into modbus IP/TCP. It listens to the data being transmitted on the RS485 line and converters it to TCP. This device is typically installed inside the Main DAS enclosure and allows the Denowatts Gateway to gather crucial system information when direct RS485 connection is not an option.
The Elkor ETport equipment manuals can be downloaded directly from Elkors website for the ETport
- The Modbus Commander Utility must be downloaded to complete installation of ETport
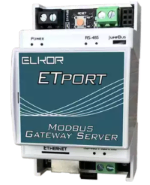
The ETport installation takes minutes to install and requires:
- Communication Wiring
- Ethernet (RJ45) cable
- RS-485 cable
- Power Wiring (9-32 VDC)
- Modbus Commander Utility software from Elkor *bottom of the page.
- Lap top and spare ethernet cable
In most cases when you are tasked with installing this device it will be to convert a production meter, a group of inverters, or a group of other RS485 devices over to TCP.
Installation
A complete installation of the ETport covers both the physical hardware
1. Mount
- Secure the ETport to available DIN rail within the cabinet.
2. Connect
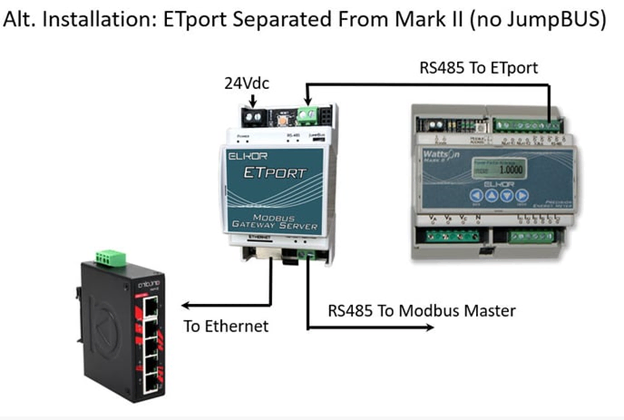
- Connect DC power to the ETport power terminals
- Connect RS485 wiring from MASTER/PRIMARY/Datalogger side of Modbus loop to BOTTOM RS485 terminals of ETport.
- Connect SLAVE/secondary devices side of modbus loop to TOP RS485 terminals of the ETport.
- ensure proper polarity on the +/- of the modbus RS485 wiring.
- Connect ETport to the ethernet switch via CAT5 cable.
Below is a wiring diagram using an Elkor WattsOn Mark II Meter. Any singular device or loop of modbus RS485 device can be substitute here.
3. Configure Network Settings
- Connect your computer to the ETport via ethernet cable.
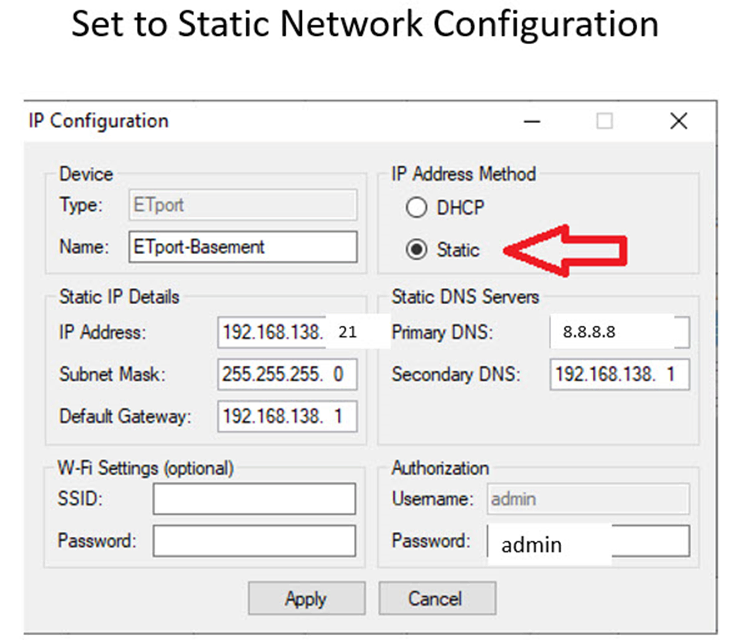
- Using the **Modbus Commander Utility.
- Use Device Finder to identify the ETport.
- Click: Network Configuration.
- Change from DHCP to Static.
- Change the IP address so it matches the LANIP specified by your Network Administrator or Denowatts.
- Check the Subnet mask, Default Gateway, Primary DNS, and Secondary DNS match what your Network Administrator has provided.
- Add "admin" in the Authorization password.
- Click "Apply." You are done configuration the network settings.
4. Verify
Once the ETport is configured, please note the modbus address or "Unit ID" of the meter.
Please send the final network configuration of ETport and modbus unitID of the meter to Denowatts. We will verify the installation and if communication has been established
- By Phone: 978.309.6688 x1
- Email: support@denowatts.com
Last updated on